|
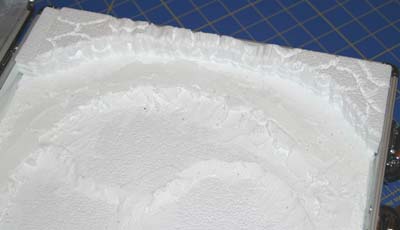
Foam putty was
used to bevel the top of the mountain down to the filler end-piece. More
foam putty was smeared (I use a butter knife as a spatula) over the flat
regions at each end of the mountain and then with a "touch and pull
away" technique I created some texture in the level areas with the
flat side of my knife.
After the foam
putty had dried I painted the
mountain with Woodland Scenics "Earth Color
Kit." I used a 3/4-inch paintbrush (not the
foam paintbrush that comes with the Kit). I
diluted the Stone Gray paint with water so
that it wouldn't be opaque and covered the
visible surfaces of the mountain. Before the
paint had dried, I used a small paint brush
to
add Burnt Umber paint sparingly to the
central region of the vertical face, then
used a little Yellow Ochre on the
top
surface and upper
parts of the vertical face
to create a little
variety in the color of
the stone.
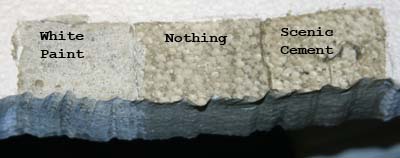
I don't know if
it's worth worrying about, but the particulate nature of the foam board
became a bit more obvious when painted - the pigments concentrated more
where the little styrofoam beads were in contact. I thought that perhaps
painting the foam first with White paint or Scenic Cement might help. The picture at
the right shows what happened
when I tested this. At the left is a section
of foam painted with White paint from the
Earth Color Kit. The center is unpainted. On
the right I painted with Scenic Cement. After
two layers of each had dried, I painted over
all three spots with diluted Stone Gray. The
Scenic Cement made practically no difference, while the White paint did a
pretty good job.
|